In the world of restorative dentistry, the journey from diagnosis to a perfectly seated restoration begins with a single, crucial step: the dental impression. Whether you prefer the tactile experience of traditional materials or the precision of a digital scanner, the accuracy of that initial impression is the ultimate determinant of your final outcome.
In this guide, we'll explore best practices for achieving flawless results, in both the physical and digital realms, to ensure a seamless workflow with your dental lab.
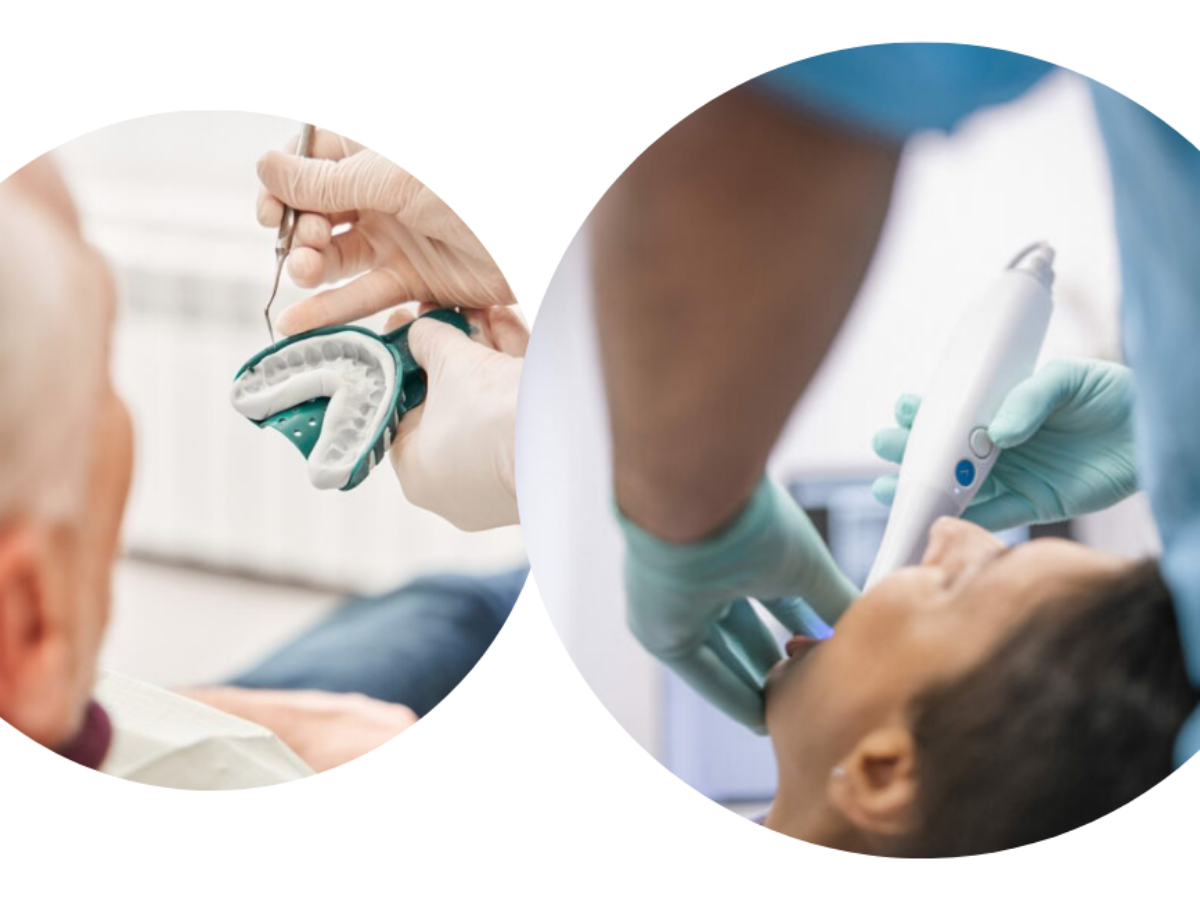
The Art of the Physical Impression
For decades, physical impressions have been the gold standard. While they require meticulous technique, mastering the process guarantees a detailed and reliable record of the patient's anatomy.
Preparation Is Key
- Select the Right Tray: A properly fitting tray is non-negotiable. It should provide adequate clearance (at least 3-5mm) between the teeth and the tray walls to allow for an even thickness of impression material. Test the tray in the patient's mouth before loading it to ensure it captures all necessary landmarks, including the retromolar pad or tuberosity.
- Material Matters: Always adhere to the manufacturer’s instructions for your impression material (alginate, PVS, etc.). Pay close attention to the water-to-powder ratio and mixing time. A grainy or streaky mix is a red flag and will compromise the final impression. For PVS materials, always use a tray and wash from the same manufacturer to ensure chemical compatibility.
- Manage the Field: A clean, dry field is essential. Control saliva and bleeding with cotton rolls, suction, and hemostatic agents. Remember to rinse the prep thoroughly after using hemostatic agents to prevent any residue from inhibiting the material's setting reaction.
Technique and Execution
- Control the Patient: Patient movement and a strong gag reflex are the arch-nemeses of physical impressions. Have the patient sit upright and lean slightly forward. Encourage them to breathe slowly through their nose and use distraction techniques, such as asking them to wiggle their toes, to minimize movement.
- Prevent Voids and Bubbles: Before seating the loaded tray, use a syringe to apply wash material around the occlusal surfaces and margins of the prepared tooth. This ensures the low-viscosity material captures every detail and pushes out any trapped air.
- The "Snap" of Success: Once the material is fully set according to the manufacturer's directions, remove the tray with a quick, decisive "snap." A slow, rocking motion can cause distortion and tearing. Inspect the impression immediately for any voids, tears, or drag marks, and be ready to retake it if necessary.
The Precision of the Digital Impression
Digital intraoral scanning has revolutionized restorative dentistry, offering unparalleled accuracy, improved patient comfort, and a faster turnaround time. However, it is not simply a matter of waving a wand—it requires its own set of techniques.
Mastering the Scanner
- Isolation is Everything: Just like with physical impressions, a dry, isolated field is paramount. Saliva, blood, and moisture can cause distortions in the scan data, leading to "holes" or misaligned segments in the final model. Use cotton rolls and air to ensure the area is completely dry before you begin.
- Follow a Consistent Path: Each scanner manufacturer has a recommended scanning pathway (e.g., occlusal, then lingual, then buccal). Following this strategy is crucial for the software to "stitch" the images together correctly and prevent stitching errors or distortion.
- Maintain Your Distance: Hold the scanner tip at the correct distance from the tooth surface, typically 10-20mm. Holding it too close or too far can lead to blurry images and incomplete data capture. Avoid extreme angles and ensure the scanner has a clear line of sight to the prepared tooth and margins.
Avoiding Common Digital Pitfalls
- Reflective Surfaces: Smooth, shiny surfaces like enamel or highly polished restorations can confuse the scanner. Lightly air-drying or applying a thin layer of powder (if your scanner requires it) can help reduce light reflection and improve data acquisition.
- Missing Margins: The most common error in digital impressions is a missing or unclear margin. A good digital scan should reveal a crisp, continuous margin that you can trace on the screen. If you can’t see the margin, the lab can’t either. Use retraction cord or paste and plenty of air to clearly expose the finish line.
- Review Your Work: Take a moment to review the 3D model on the screen after completing the scan. Check for any missing data, particularly on the mesial and distal surfaces of the adjacent teeth. Use the software's tools to trim any unnecessary soft tissue and confirm the bite registration is accurate before sending the file to the lab.
Conclusion
Whether you're a seasoned practitioner relying on time-tested techniques or a digital pioneer embracing the latest technology, the attention to detail you bring to the impression process is what defines a successful outcome.
At Chase Dental Lab, we pride ourselves on our expertise with both physical and digital workflows. By providing us with a high-quality impression—whether in a box or as a digital file—you ensure that we can deliver a precise, beautiful, and perfectly fitting restoration every time.
Disclaimer: The information provided in this article is for educational purposes only and is not intended to replace independent clinical judgment. Clinicians should evaluate each case individually and follow manufacturer instructions, current evidence-based guidelines, and their own professional expertise. Chase Dental Lab assumes no responsibility for patient outcomes resulting from the application of the information presented here.