Custom dental implant abutments are the cornerstone of a restoration that is both aesthetic and functional. Unlike stock abutments, custom designs allow for ideal tissue contouring, precise cement line placement, and a seamless fit with the prosthesis. But their success depends on one critical factor: the accuracy and quality of the information the treating doctor provides to the dental laboratory.
To ensure predictable outcomes, clinicians should follow a structured, detail-oriented protocol. Below is a comprehensive checklist of the essential steps every doctor should take.
1. Initial Assessment & Planning
The groundwork for a successful custom abutment begins long before the impression stage.
- Treatment Planning & Space Assessment: Confirm adequate restorative space in all dimensions—mesiodistal, buccolingual, and occlusal. Insufficient space compromises strength, esthetics, or hygiene access.
- Implant Placement Verification: Use CBCT imaging and surgical guides to confirm the implant’s three-dimensional position.
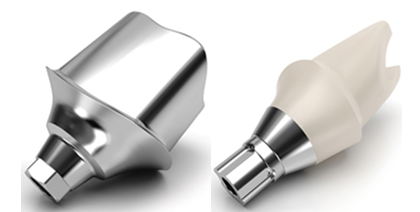
- Material Selection: Choose the abutment material—titanium, or zirconia hybrid—based on location, occlusal load, restorative space, and esthetic demands. Communicate this clearly to the lab.
2. Accurate Impression & Data Capture
The impression (or scan) is the lab’s roadmap. Any distortion or omission will directly affect the fit.
- Soft Tissue Conditioning: Ensure peri-implant tissue is healthy and stable before the final impression to accurately capture the emergence profile.
- Impression Technique: Open-tray techniques are generally preferred for custom abutments, as they reduce rotational error and improve accuracy.
- Impression Components: Use the correct coping, confirm full seating, and verify radiographically if needed. Capture the full arch and adjacent teeth for articulation and contact accuracy.
- Digital Workflow: When scanning, use the correct scan body for the implant system. Capture the implant site, soft tissue, opposing arch, and bite registration in full detail.
3. Detailed Lab Communication & Prescription
The lab prescription is the blueprint for success. It must be clear, complete, and unambiguous.
- Design Specifications: Define margin depth (equicrestal or subgingival), emergence profile (mirror provisional or specify contour), and occlusal angulation.
- Path of Insertion: Indicate the intended path of insertion, ensuring alignment with adjacent restorations.
- Essential Records
- Accurate impression or STL file
- Opposing arch model/scan
- Bite registration
- Shade instructions (including abutment shade for esthetic cases)
- Provisional abutment/crown (when available) for contour reference
4. Verification & Final Seating
Fabrication is only part of the process—clinical verification ensures long-term success.
- Test Fit: Verify the abutment on both the master model and intraorally. It should seat fully without rocking or rotation.
- Radiographic Confirmation: Confirm complete seating radiographically to rule out gaps at the implant–abutment interface.
- Soft Tissue Evaluation: Assess tissue response and contour. A properly designed abutment should support healthy, stable peri-implant tissue.
- Final Torque: Secure the abutment to the manufacturer’s recommended torque using a calibrated wrench.
Conclusion
Custom implant abutments deliver unmatched precision, esthetics, and function—but only when the doctor and lab work in perfect sync. By following this structured protocol, clinicians provide the lab with the clarity and detail needed to fabricate abutments that are strong, predictable, and esthetically superior.
At Chase Dental Lab, we view every case as a partnership. With precise planning and open communication, together we can deliver restorations that achieve optimal patient outcomes and stand the test of time.
Disclaimer: The information provided in this article is for educational purposes only and is not intended to replace independent clinical judgment. Clinicians should evaluate each case individually and follow manufacturer instructions, current evidence-based guidelines, and their own professional expertise. Chase Dental Lab assumes no responsibility for patient outcomes resulting from the application of the information presented here.