For a dental lab, a prescription that simply says "A2" is often the start of a guessing game. While shade guides are essential, they are subjective and limited by ambient lighting and human eye fatigue. To truly capture the nuances of a patient’s dentition—translucency, characterization, and internal effects—photography is your most powerful communication tool.
Whether you use a professional DSLR or a smartphone, this guide will help you provide the lab with the data needed for a "first-time fit" esthetic result.
1. The Foundation: Timing and Hydration
The most common mistake in shade taking happens before the camera even comes out.
- Take the Shade FIRST: Enamel dehydrates within minutes of the mouth being open. Dehydrated teeth appear whiter and more opaque. Always capture your shade photos within the first 2 minutes of the patient sitting down.
- Remove Distractions: Ask the patient to remove bright lipstick. If they are wearing vibrant clothing (red, neon), cover it with a neutral gray or blue patient bib to prevent color reflection onto the teeth.
- Clean and Moist: Ensure the teeth are free of plaque and kept hydrated with saliva or water during the process.
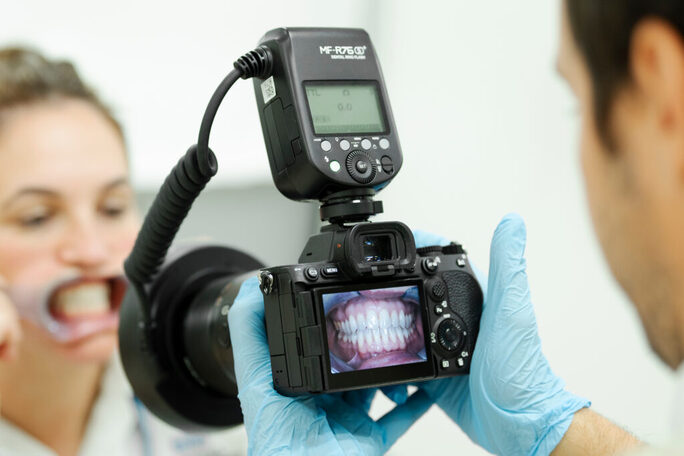
2. Gear & Settings: Professional Camera vs. Smartphone
Consistency is your best friend. Use the following settings to ensure the lab receives high-quality, calibratable images.
For Professional DSLR / Mirrorless Users
- Lens: 100mm or 105mm Macro lens.
- Aperture: f/22 to f/32 (Provides a deep depth of field so everything is in focus).
- ISO: 100 or 200 (To minimize "noise" or graininess).
- Shutter Speed: 1/125 to 1/200 sec.
- Flash: Ring Flash or Twin Flash.
- White Balance: Set to "Flash" or a custom 5500K setting.
For Smartphone Users (iPhone/Android)
- Lens: Use the 2x or 3x Optical Zoom button. Avoid "pinching" the screen to zoom, as this is digital zoom and destroys the fine detail of the tooth.
- Focus: Tap the target tooth on your screen to set the focus point.
- Exposure: After tapping to focus, slide the "sun" icon down slightly to ensure the white of the tooth isn't "blown out" by the light.
- Lighting: Use a mobile dental lighting accessory. Avoid using the built-in phone flash alone, as it creates harsh "hot spots."
- Filters: Ensure all "True Tone," "Warmth," or beauty filters are turned OFF.
3. The "Perfect Shot" Protocol
Follow these steps for every shade photo to ensure the lab can accurately interpret the color.
- Incisal-to-Incisal: Position the incisal edge of the shade tab directly against the incisal edge of the target tooth.
- The Same Plane: Ensure the face of the shade tab is on the exact same vertical plane as the tooth. If the tab is tilted forward (closer to the camera), it will appear brighter; if it is tilted back, it will appear darker.
- Label Visible: Always ensure the shade name (e.g., A1, 2M2) is clearly visible in the frame so the technician knows exactly which reference you are using.
- The Stump Shade: For e.max or translucent zirconia, the preparation color significantly impacts the final result. Capture a "stump shade" immediately after prepping using a Natural Die (ND) guide.
4. Essential Photo Checklist for the Lab
To provide a complete "visual prescription," please include these four photos with your digital submission:
- Full Smile: To evaluate the lip line, midline, and general facial harmony.
- Retracted Frontal (Pre-Op): A high-detail shot of the target tooth and adjacent teeth for texture and characterization.
- Shade Tab Photo: Target tooth alongside the chosen shade tab (with the label visible and in the same plane).
- The "Value" Shot: If using a DSLR, take one photo at f/32 (slightly underexposed). If using a phone, use a black-and-white filter. This removes color distraction and allows the technician to see internal anatomy and brightness levels clearly.
Summary
By integrating these steps into your clinical workflow, you move from "guessing the shade" to "capturing the data." This leads to reduced remakes, saved chair time, and—most importantly—a restoration that seamlessly disappears into your patient’s smile.
Pro Tip: When in doubt, take two photos—one with the shade you think is correct, and one with a tab that is one step darker or lighter. This "bracketing" gives the lab a range for comparison.
Contact us to get started.
Disclaimer: The information provided in this article is for educational purposes only and is not intended to replace independent clinical judgment. Clinicians should evaluate each case individually and follow manufacturer instructions, current evidence-based guidelines, and their own professional expertise. Chase Dental Lab assumes no responsibility for patient outcomes resulting from the application of the information presented here.